How to Install a Mirror at Home – Step by Step
This guide explains how to install a mirror safely and securely at home, using simple step by step methods suitable for all experience levels and covers planning, measuring, using mirror adhesive, and alternative fixings.
MirrorFit generally recommends mirror adhesive as our first choice for most wall mounted mirrors. It provides a clean, modern look with no visible screws. Holes and screws, and J channels are also options.
Important: For safety, we do not recommend screw fixing mirrors larger than 1sqm. Larger mirrors are heavier, more vulnerable to stress around screw holes, and are better bonded with mirror adhesive.
Before You Start: How to Install a Mirror Safely
Check the wall surface
- The wall should be reasonably flat, dry and free from loose plaster, flaking paint, grease or dust.
- Suitable surfaces include plaster, plasterboard, brick, blockwork and tiled walls.
Check the mirror
- Confirm the size and thickness.
- Inspect all edges and corners before installation.
Safety
- Mirrors are heavy and fragile.
- For this reason, larger mirrors should always be lifted and positioned by two people.
- In addition, wear protective gloves, glasses and closed footwear.
Tools and Materials
You will typically need:
- Tape measure
- Spirit level
- Pencil
- Mirror adhesive (recommended)
- Optional: temporary support blocks
- For screw fixings: drill, drill bits, wall plugs, screws and caps
- Clean cloth and mild cleaner for the wall
Plan the Mirror Position
Decide the height
- Bathroom mirrors – measure from the top of the basin or splashback.
- For full length mirrors, ensure there is space to stand back.
Mark the outline
- Measure the height and width of the mirror.
- Then lightly mark the outline on the wall with pencil.
- Finally, use a spirit level to check that the top line is perfectly horizontal.
Check what the mirror will reflect
- Stand back and imagine what the mirror will reflect.
- For best results, reflect either light or calm areas of the room.
How to Install a Mirror with Adhesive (Recommended Method)
This is the cleanest, simplest and most attractive fixing method. When installed correctly, adhesive is extremely strong and can easily support the weight of a standard 6mm mirror.
1 – Prepare the wall
- Clean the wall within the outline using a suitable cleaner and allow it to dry fully.
2 – Prepare supports
If the mirror is not resting on a vanity or shelf, prepare temporary supports such as:
- Small wooden battens screwed just below the bottom line, or
- Strong wedges or spacers taped securely in place.
These supports help the mirror sit securely while the adhesive cures and will be removed afterwards.
3 – Apply mirror adhesive
- Lay the mirror face down on a soft, flat surface.
- Apply mirror adhesive in a grid pattern every 20cm along vertical lines, keeping 10cm away from the edges. We recommend ping pong ball size blobs.
- We recommend using specially formulated mirror adhesive.
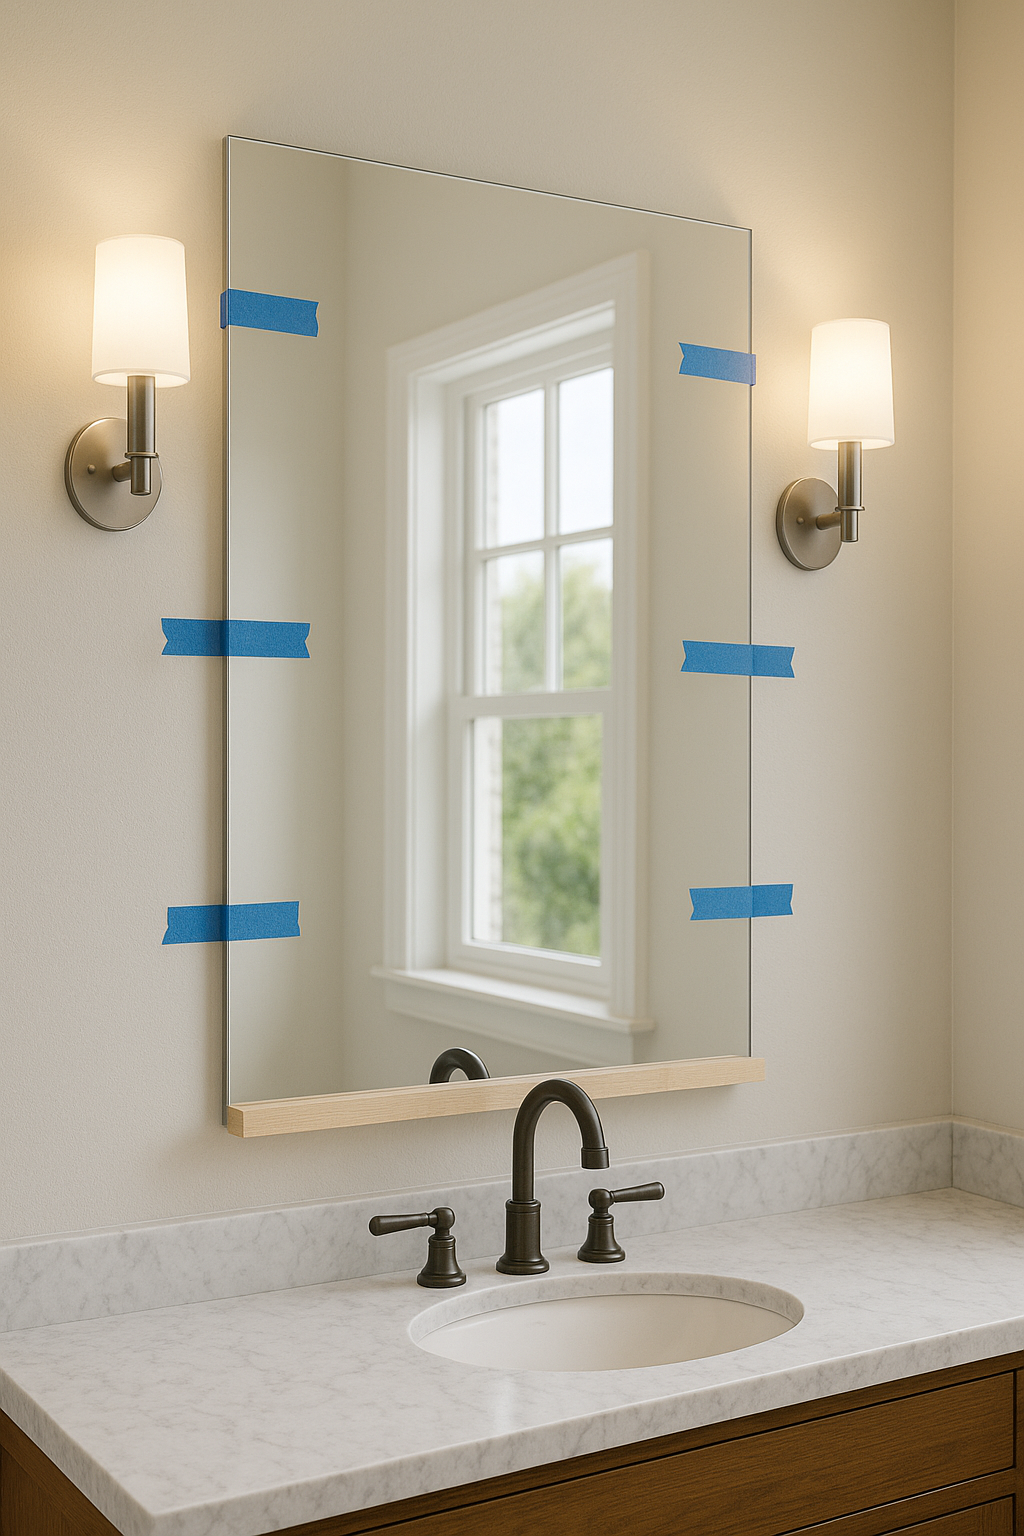
4 – Lift and position the mirror
- With two people, lift the mirror carefully and place the bottom edge onto the supports.
- Press the mirror firmly against the wall so the adhesive spreads evenly.
- Use a spirit level to check the alignment immediately and correct if necessary while the adhesive is workable (you have 2-3 minutes to adjust the alignment).
5 – Support during curing
- Follow the adhesive manufacturer’s drying time.
- As a general guide, allow at least 24 hours before removing supports.
6 – After 24+ hours remove supports and clean
- Once cured, remove all supports carefully.
- Clean the mirror using a suitable cleaner and a soft cloth.
When installed properly, adhesive delivers a strong, permanent bond.
How to Install a Mirror with Screws and Caps
If you prefer a more traditional fixing or need to remove the mirror in future, screws are an alternative to adhesive, but are best for smaller mirrors. They are not recommended for mirrors larger than 1sqm as adhesive is a much secure fixing method.
1 – Mark fixing points
- Measure and mark the hole positions precisely.
- Then place the mirror against the wall temporarily to confirm accuracy.
2 – Drill the wall
- Drill holes in the marked positions using the correct bit for your wall type.
- Then insert wall plugs.
3 – Hang and secure
- Lift the mirror into place, insert rubber grommets followed by screws and partially screw in place.
- Once all 4 screws are in place, carefully tighten screws until just touching the grommets.
- Do not over tighten.
- Finally, fit decorative caps to finish.
J Channels and Trims
J channels can be used for a specific design effect or to support the bottom of a very large mirror. However, they are not usually necessary and are chosen more for style and edge protection.
Mirror adhesive remains our preferred method for a clean, modern installation.
Installing a Mirror with a Demister Pad
Demister pads keep bathroom mirrors clear in steamy conditions. They must be wired in by a qualified electrician before the mirror is installed. We recommend that the demister pad is attached directly to the foil backing of the 6mm mirror, this is for safety and the prolonged life of your mirror.
1 – Connect the demister pad
- Have a qualified electrician connect the demister pad to the mains.
- To ensure a flat fixing, the wires should not protrude or they will not give a flat surface for the mirror. In most cases we recommend they are chased or hidden in the wall
- Before installation, test that the demister pad warms evenly.
2 – Position the demister pad
- Lay the mirror face down.
- Place the demister pad (with backing still on) on the back of the mirror.
- Mark the position of the demister pad ensuring there is at least 150mm between the pad and each edge of the mirror.
- The pad should not cover more than 70% of the mirror.
- Finally check the cable route aligns with the wall cable.
3 – Fix the pad to the mirror
- Peel off the backing and stick the pad firmly in place.
4 – Apply adhesive
- Apply mirror adhesive only around the demister pad, not over it.
- Then follow the standard adhesive steps mentioned above (positioning, levelling, curing).
Final Checks and Aftercare
- When you install a mirror, always check alignment with a spirit level before the adhesive sets.
- Avoid vigorous cleaning in the first 24 hours.
- Clean using a soft, lint free cloth and mild glass cleaner.
- Avoid abrasive cleaners and strong ammonia based products.
- Keep edges dry to prevent deterioration over time.
Ready to order your mirror? Get an instant mirror quote
Prefer a Professional Installation?
If you’d rather not deal with lifting, levelling or fixings, we can install your mirror for you. MirrorFit offers a professional fitting service across London and within the M25, from £100.
Our experienced installers will:
- Deliver, handle and lift the mirror safely
- Prepare the wall surface
- Position and level the mirror precisely
- Use the most suitable fixing method
- Ensure a clean, secure and professional finish
If you’d like us to install your mirror, just let us know when you place your order and our team will book it in. For full information see our Fitting page.
Still Need Help?
If you are unsure about measurements, fixing methods, or the best mirror type for your space, the MirrorFit team can help. Contact Customer Service with your dimensions and a photo of your space for personalised guidance.